So I've actually been working on a combination of codecademy and watching a very useful Digital tutors video on coding in Unity.
http://www.digitaltutors.com/11/training.php?vid=12817&autoplay=1
http://www.codecademy.com/courses/javascript-beginner-en-NhsaT/0?curriculum_id=506324b3a7dffd00020bf661#!/exercises/4
I finished my rock paper scissors game and now I am learning about the different kinds of loops, such as for and while. In the digital tutors video, it discusses the basics of coding in Unity and points out a few of the differences between regular javascript and Unity's. It taught me how to make a simple move and jump script, along with tips on making your own scripts. Also, it really shows the importance of using the Unity script reference religiously to answer any questions. For the video tutorial, I'm just taking a bunch of notes and trying to absorb as much information about Unity scripting as I can.
Tuesday, February 26, 2013
Wednesday, February 13, 2013
Coding Tutorials
I've been learning Javascript on Codecademy. In the current tutorial I'm doing, I am making a simple rock paper scissors game involving a ton of If/else if/else statements and I've also learned how to make variables and functions. This website is so fun and I'm learning a ton of stuff about coding. Now when making our game I can kind of understand what is going on with coding.
http://www.codecademy.com/tracks/javascript
var userChoice = prompt("Do you choose rock, paper, or scissors?");
var computerChoice = Math.random();
if (computerChoice <= 0.33)
{
computerChoice = "rock";
}
else if (0.34 < computerChoice && computerChoice <=0.66)
{
computerChoice = "paper";
}
else
{
computerChoice = "scissors";
}
console.log(computerChoice);
Here is a part of the code for the game, and basically the computer pick a random number between 0 and 1, and then I made a statement so that if the code is between a certain range, it will pick either rock, paper, or scissors. And it also prompts the user on what they pick.
Wednesday, January 23, 2013
Fur Tutorial in Maya
http://www.digitaltutors.com/11/training.php?pid=264
So I used this tutorial to learn a little bit about fur before diving into applying fur to a duck. So I decided to use the default fur called duckling. To apply the baldness in areas such as beak, eyes, and feet, I created a UV map for my duck, then took that UV map into photoshop and colored the bald areas black. Then I connected that file to the baldness attribute in the fur node. I also adjusted the global scale to fit the duck model.
So I used this tutorial to learn a little bit about fur before diving into applying fur to a duck. So I decided to use the default fur called duckling. To apply the baldness in areas such as beak, eyes, and feet, I created a UV map for my duck, then took that UV map into photoshop and colored the bald areas black. Then I connected that file to the baldness attribute in the fur node. I also adjusted the global scale to fit the duck model.
Wednesday, January 16, 2013
Skills Room
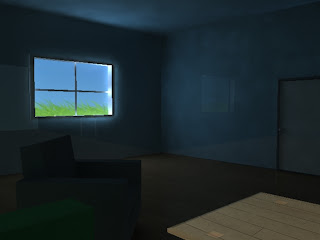
Our skills project. Used photon lighting, where there is basically a directional light emitting light and an area light emitting the photons in the scene. The floor looks a little too reflective but that's an easy fix. The duck and cardboard box haven't been placed in yet either. I'm thinking about adding another light to the scene to lighten the mood a bit.
Thursday, December 6, 2012
Lighting the scene
So, I'm going to render my scene with metal ray, and I have a photon emitter coming through the window. It's gonna take forever but I don't care. :D
Monday, December 3, 2012
Final Project - Fall
The cat model seems a little rough, but whenever I add a fur to it, that should fix some of the weirdness. I'm starting to model the inside of the house and objects, my cat is already rigged and the paint weights need a ton of work.
Friday, November 9, 2012
Subscribe to:
Posts (Atom)


